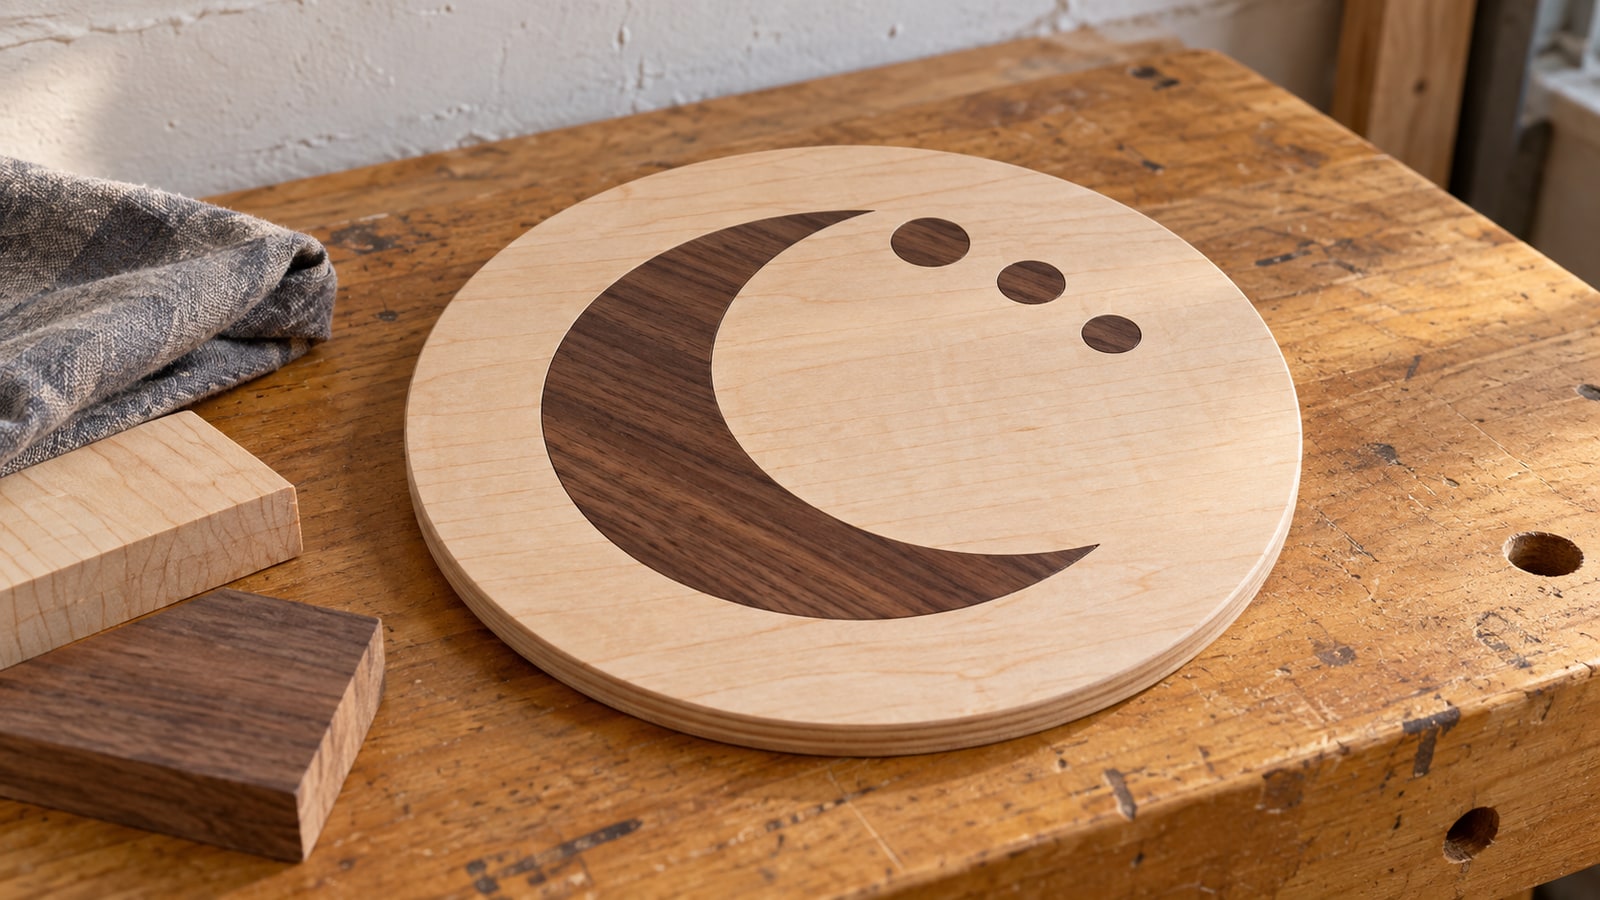
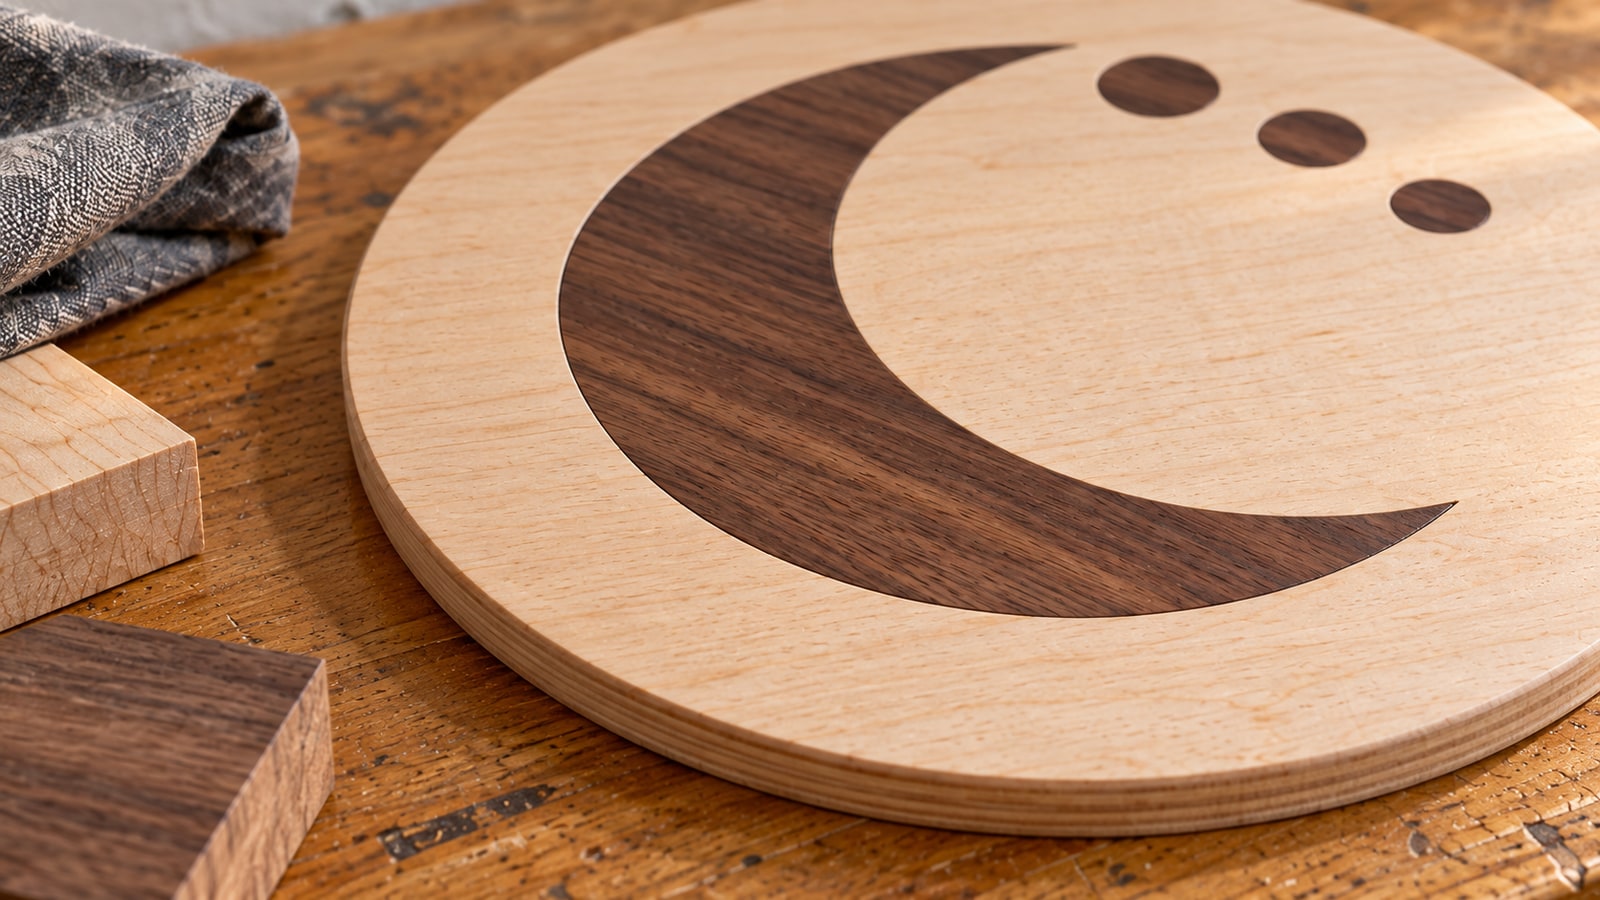
You cut a crescent moon out of walnut and the matching window out of maple, held your breath, and dropped the walnut in. It fell straight through. Or the other way round: you shrank the piece by a guess, forced it, and split the board getting it seated.
Inlay is one of the few crafts where the whole job is decided before the machine turns on. The cavity and insert can share a master outline, but their tool center paths need different compensation because the cutter removes material on both sides. Deciding where it comes from is a file-side question, which puts it squarely in our territory.
Tip
Short answer: one outline, two parts, and the tool removes material from both. Cut them from the identical path and you get a gap of roughly one cutter width on every side. Close it by moving the cavity's cut line inward and the insert's outward, apply that offset in your machine software rather than in the master drawing, and find the value by cutting a small ladder of test shapes in the same species and thickness as the real job.
What you are actually making
An inlay is a piece of one wood set into a cavity cut in another, so the two sit flush and the difference in colour draws the design. No paint, no scorch line pretending to be a shadow. The image is made of wood.
The contrast is the entire effect, so pick the pair first and design to it. Walnut into maple is the classic because the value difference is enormous and both machine cleanly. Cherry into maple is softer, and warms further as the cherry darkens with light exposure. Padauk gives you orange that fades toward brown over time, worth knowing before you build a piece around it. Our wood guide goes through the species in more detail.
Keep the two boards reasonably close in hardness. A soft insert in a hard base compresses under clamping pressure and can end up sitting proud once it springs back.
Why one path cannot serve both pieces
Here is the geometry, and it is the only part of inlay that people reliably get wrong.
A laser beam has a width. It burns away a channel of material centred on the path it follows, and that channel is the kerf. A router bit has a diameter and does the same thing, centred on whatever line the toolpath follows.
For this example, assume the same measured kerf on both woods. In practice, test both species separately. Now cut a circle in each with no compensation:
- The cavity loses half a kerf from the inside of the line, so the hole is larger than the drawn circle by half a kerf all the way round.
- The insert loses half a kerf from the outside of the line, so the disc is smaller than the drawn circle by half a kerf all the way round.
Put them together and the clearance on every side is a full kerf, not half. Across the diameter the piece is loose by two kerfs. That is why the walnut moon rattles in the maple window even though the file was perfect, and it is why "just cut it twice" never works.
The fix is an allowance: an offset that closes that gap. The parts only care about the total, so you can spend it in one place or split it, and that choice is not cosmetic.
Split it evenly and both parts land on the drawing. Move the cavity’s cut line inward by half its measured kerf and the insert’s outward by half its own measured kerf. This targets the drawn size before adding deliberate fit clearance. That is the neutral option and a sound default. It also produces a zero clearance fit, so nudge it a hair either way depending on how tight you want the joint and how much room the glue needs.
Push it all onto the insert (cavity cut on the line, insert offset outward by a full kerf) and the piece comes out a touch heavier than drawn. Good news for a crescent that tapers to a fine horn or a star with slender points, because those are the parts that snap between your fingers. The cost is that gaps inside the design close up: two elements drawn close together each grow toward the other, and the strip of base wood left between them gets thinner.
Push it all onto the cavity (cavity offset inward by a full kerf, insert cut on the line) and the base board keeps its material, so narrow bridges between elements stay strong. The cost is an insert that finishes smaller than drawn, with every thin feature thinner on both sides, and tighter inside corners for a router bit to reach.
The rule that falls out of that: work out which half of the design is the fragile half. If it is the insert, feed the allowance to the insert. If it is the base wood between closely spaced elements, feed it to the cavity. Chunky artwork does not care, so split it and get on with the job.
Applying the allowance without ruining your master file
The temptation is to open the SVG, offset every path, and save. Resist it. The moment you bake an allowance into the drawing, that file only fits one machine, one bit, one material and one day's beam alignment, and you will not remember which.
Do it in the machine software where you can. LightBurn provides a Kerf offset field in its cut settings, so you can send the same geometry twice with a different offset on each pass. Vectric's VCarve and Aspire have a dedicated inlay option on profile and pocket toolpaths with an allowance value, which exists for precisely this problem. Check the current documentation for how each one applies the number, because "half the kerf" and "the whole kerf" are both plausible conventions and the software decides which it means, not you.
When the software cannot do it, work on a copy. In Inkscape, Path > Inset and Path > Outset move a path by the step set in Preferences under Behavior > Steps, so set that value deliberately rather than accepting the default. Illustrator's Object > Path > Offset Path takes a value directly and previews the result.
Watch what the offset does to concave corners and narrow gaps. Vector offsets can self intersect where two edges converge, leaving a loop that a machine will happily cut as a real feature. Zoom in on every tight area of the offset copy before you send it.
Name the two versions clearly. moon-cavity.svg and moon-insert.svg beat two tabs you can no longer tell apart, since the difference is far too small to see on screen.
Finding the number, honestly
We do not own a laser or a router, so we are not going to publish a kerf figure and pretend it applies to your machine. It varies with power, speed, lens, focus, air assist, species and thickness, and a number copied from a forum is how boards get ruined. What we can hand you is a method that costs one offcut.
- Take scrap of the same species and thickness as the real job. Kerf on 3mm ply tells you nothing useful about 12mm walnut.
- Draw one simple test shape. A circle roughly the size of the largest feature in your design works well, since a circle has no corners to confuse the result.
- Make five or six copies of the pair, cavity and insert, each with a slightly different allowance, stepped evenly. Label each row with a notch or a dot count rather than text, since tiny engraved numbers on scrap are hard to read.
- Cut the whole ladder in one job so every pair sees the same conditions.
- Fit each pair by hand. You want the one that pushes home with firm thumb pressure and stays put without glue. Do not force the fit. Leave the clearance required by the joint and adhesive, and inspect the seam after cleanup.
- Write the winning value on the offcut and keep it. That is a starting record for the tested stock and settings. Recheck after a material batch, focus, optics or cutting-setting change.
Keep a record by material and thickness, and verify it when conditions change. The exercise doubles as a general test cut routine for any new sheet.
Three ways to build one
The construction changes what the file needs to contain, so decide before you start editing.
Through-window inlay, the laser method
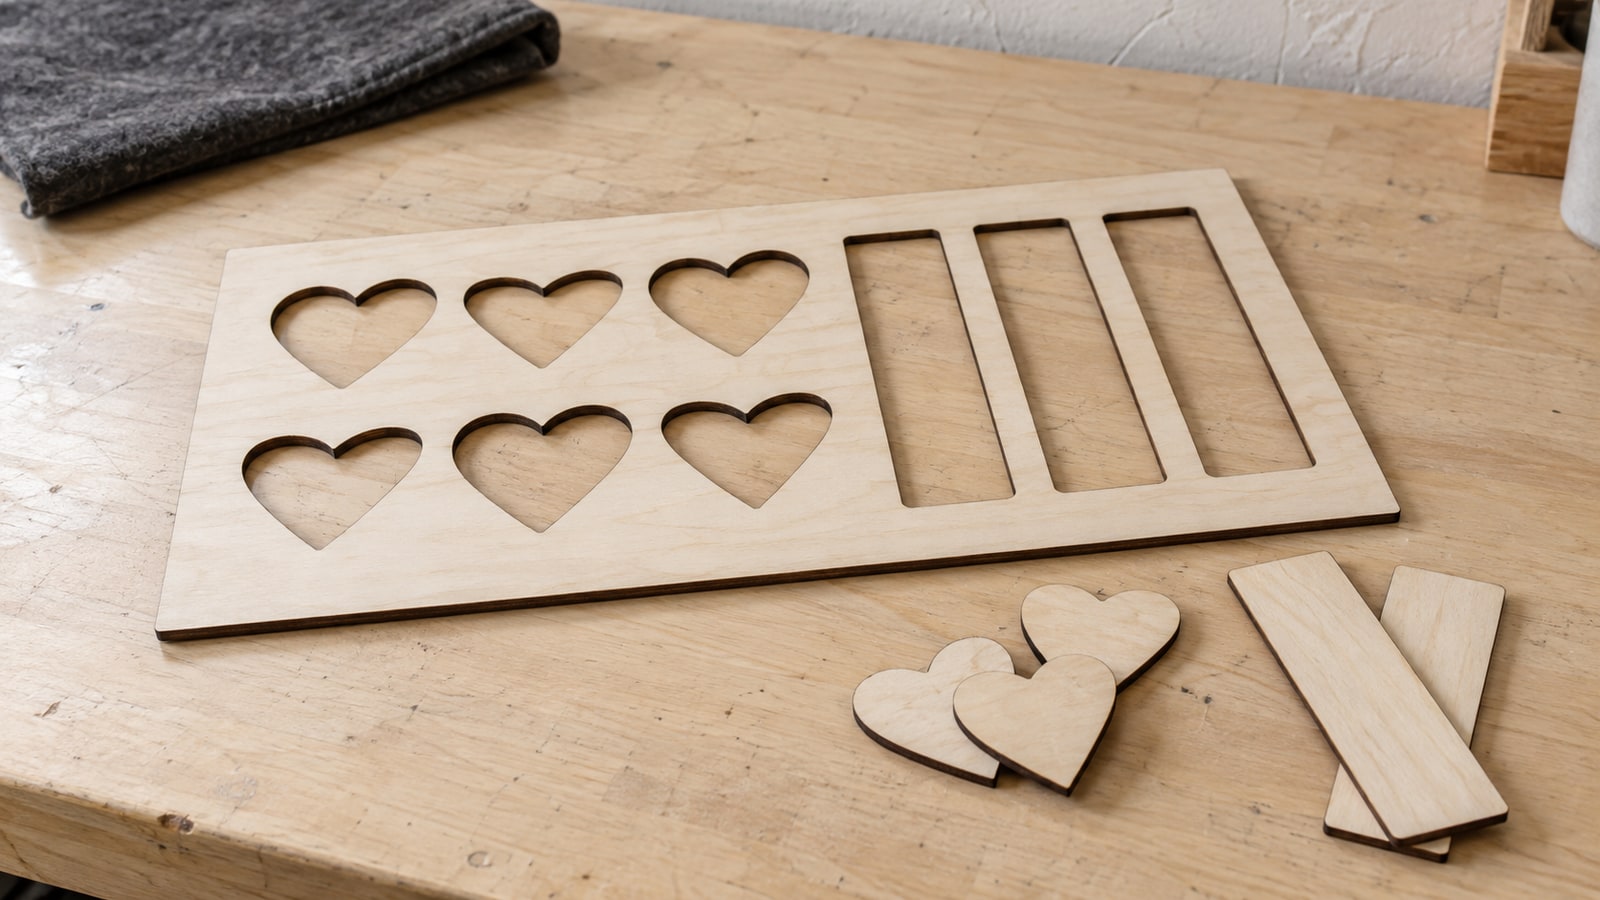
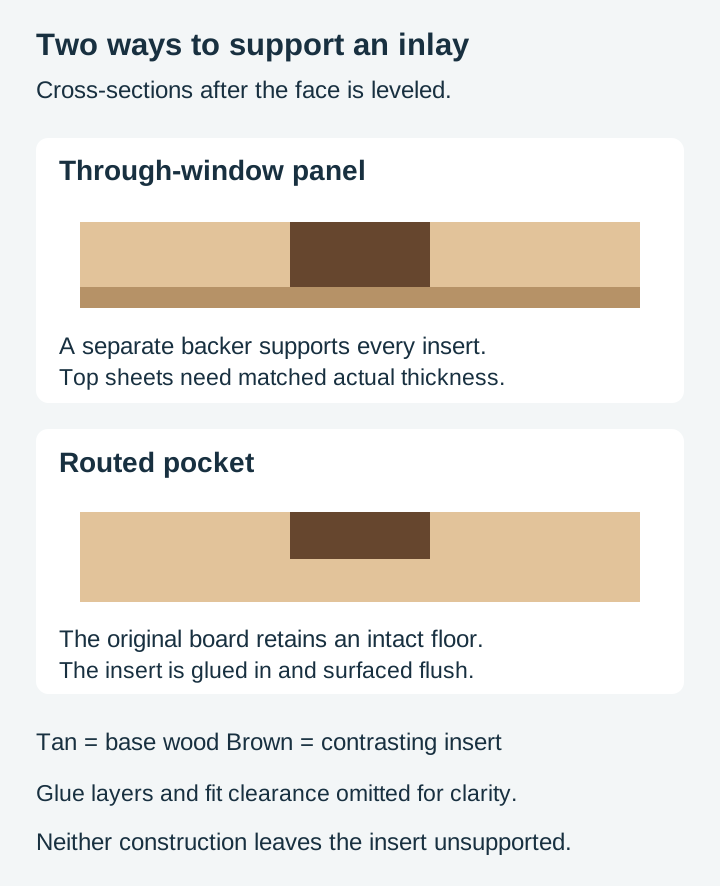
Cut a window straight through board A, cut the matching shape straight through board B, drop the shape into the window, and glue the assembled panel onto a thin backer. Matched actual thicknesses help the faces line up, but stock variation, glue and cleanup can still require leveling.
The catch is the edge. A laser leaves a dark charred wall on both parts, which shows in the seam as a fine black outline. On walnut into maple that outline often looks deliberate and rather good. On maple into walnut, where you wanted the pale wood to sing, it reads as a smudge. Sanding the char off the insert edge before glue-up is the usual answer, and it changes the fit, so decide about it before you settle on your allowance.
One more laser specific detail: the beam is not a perfect cylinder, so the cut wall carries a slight taper. Makers routinely exploit this by flipping the insert over so the taper wedges rather than falls through. If you plan to flip, the insert artwork has to be mirrored, or an asymmetric shape will not fit its own cavity. A crescent flipped is a crescent facing the wrong way.
Pocketed inlay, the router method
Pocket a cavity into the base board to a set depth, cut a matching plug from contrasting stock that is thicker than the pocket is deep, glue it in, then surface the whole face flush.
The advantage is that the base stays a solid board, so the piece can be a table top or a lid rather than a laminated panel. The constraint is the bit. A round cutter cannot produce a sharp interior corner, so every inside corner in your cavity keeps the bit's radius, and the plug must have matching rounded corners or it will never seat. Either round the corners in the artwork to match, or choose designs without tight interior angles. Our CNC router guide covers pocket toolpaths and bit geometry generally.
Cut the plug slightly proud rather than flush. Sanding down a whisker of walnut is a pleasant afternoon. A plug that finishes below the surface may require replacing the insert or resurfacing the surrounding board.
V-carve inlay, the one that self-tightens
The clever one. A V-bit cuts the cavity with sloped walls, and the same bit cuts the plug with the same slope, offset by a start depth so the plug is a slightly smaller version of the same tapered form. Press the plug in and the two tapers wedge together and pull the joint tight, so an allowance error shows up as the plug sitting a fraction higher or lower rather than as a visible gap. After the glue cures you cut away the excess plug stock and the inlay appears, with crisp points a straight-walled pocket cannot produce.
Vectric documents this workflow for VCarve and Aspire with named parameters for the gap and the start depth, and their tutorial material is the right place to get the specifics for your version. If V-carving is new, our V-carve tutorial covers the bit geometry that makes the trick work.
Which designs inlay well, and which fight you
This is the part we can speak to first hand, because we draw the files. The geometry below is about what an outline demands of the two cuts that have to meet along it.
Bold, closed, self-contained shapes. A crescent, a full moon, a sunburst, a suitably simplified animal silhouette or zodiac glyph. Anything you could describe as a shape rather than a drawing.
Generous line weight throughout, not just at the widest point. The narrowest part of the design decides whether the job works, because that is where the insert becomes fragile and where the allowance does its damage.
Few pieces. Every separate closed region becomes a separate physical insert that has to be aligned, glued and held. A single crescent is one piece. A moon phases arc is eight pieces in a row, and the eye is unforgiving about a row where one sits slightly off line. That is a fine project, but it is a different project.
No sharp interior corners if a router is cutting the cavity, for the reason above.
Now the ones that disappoint. Hairline linework loses to both the kerf and to handling. A constellation map, where the whole design is thin connecting lines and dots the size of a pin head, is one of the most beautiful things you can engrave and one of the worst things you can inlay: the lines come out as splinters and the dots are too small to pick up. Tapering points, like a five point star with long slender arms, break at the tip during dry fitting.
Our Celestial Designs pack has both halves living in one file set. The crescent with florals, the moon gazing hare, the sun and moon embrace and the vintage sun face are solid silhouettes with real weight, can provide a starting point for simplified inlays; inspect every separate region and narrow feature before choosing one. The constellation roundel and the big dipper from the same pack are engraving designs, and no amount of file preparation changes that.
 Celestial Designs30 designs, commercial license included$3.99
The zodiac pack splits the same way. Each sign's celestial emblem is a bold enclosed badge that takes to inlay, and the matching symbol-and-constellation versions are drawn as fine lines for engraving. Same subject, same pack, two completely different jobs. Read the artwork, not the theme.
If a design you love falls on the wrong side of that line, the usual rescue is scale. A shape too fine at coaster size is often perfect at 12 inches, since every feature grows while the kerf stays exactly the same. Inlay gets easier as the piece gets bigger.
File preparation checklist
Before either part goes to the machine:
- Every path closed. A cavity toolpath needs an unambiguous inside. An open contour will either be skipped or cut as a line, and a gap too small to see counts as open.
- One path per edge. Duplicate stacked outlines make the offset ambiguous and can produce two cuts a hair apart, which is exactly the width of a ruined insert.
- Filled shapes, not strokes. A stroke is a display property with no geometry behind it, and programs interpret stroke width differently by amounts comfortably larger than your allowance.
- Compound paths kept intact. The counter in a letter O has to remain a hole. If it has become a separate disc, the machine cuts it as an extra insert and leaves the counter solid.
- Text converted to outlines so the letterforms travel with the file.
- The two parts saved separately and named unambiguously.
- The insert mirrored if you intend to flip it, and only then.
Offsetting a messy auto-traced file magnifies the mess, since every stray node becomes a small bump in the offset copy. Check the actual file for closed boundaries, duplicates and unnecessary nodes before creating offsets; an engraving design may need preparation for inlay.
Glue-up, in order
- Dry fit first, every time. Press the insert home without glue and check that it seats fully and evenly. This is your last free chance to change anything.
- Clean the char off laser-cut edges if you decided to, and re-check the fit afterwards.
- Apply glue to the mating surfaces. Follow the adhesive instructions for side walls, pocket floor or backer as appropriate. Use enough for the joint without flooding the recess.
- Press it home and clamp with a flat caul across the whole face so pressure is even and nothing tips. For through-window work, clamp the panel to its backer at the same time.
- Wipe squeeze-out immediately. Glue that dries on the surface seals the grain, and sealed grain refuses stain, which shows up later as a pale halo exactly where you least want one.
- Let it cure fully before touching it. Not dry to the touch, cured.
- Level the face. Plane, sand or surface it flush. Keep the vacuum running and start at a finer grit than instinct suggests, because coarse paper drags dark dust into open pale pores and greys the maple you were trying to show off.
- Finish the whole panel as one piece. The two species take finish at different rates, and a single film over both is what makes it read as one object.
When it goes wrong
Gap all the way round. Allowance too small, or applied to neither part. Back to the test ladder.
It will not go in at all. Allowance too large, or applied in the wrong direction. Check that you shrank the cut line rather than the shape.
Fits on three sides, gaps on the fourth. Usually not the allowance. Either the artwork drifted between the two cuts or the stock moved in the machine. Check workholding before you touch the file.
A thin element snapped off. The insert was cut on the line, so it finished under size everywhere and the weakest feature gave up first. Feed the allowance to the insert instead, or scale the design up.
The plug will not seat in a routed pocket. Interior corners. The bit left a radius the plug does not have.
Pale wood looks grubby near the seam. Dark sanding dust in open grain. Seal the pale wood before the final pass next time.
Start with a shape that wants to be inlaid
The fastest way to learn this is one bold silhouette in walnut, set into a pale round blank, with a test ladder cut first. Once the fit is repeatable, the technique scales to anything.
Every PrintCutCarve pack is $3.99, ships as SVG, PNG, JPG, PDF and EPS for preparation in your chosen design and machining workflow. A commercial licence is included with every purchase, so the pieces you inlay are yours to sell.
Celestial Designs30 designs, commercial license included$3.99 Zodiac & Astrology Designs50 designs, commercial license included$3.99
Browse the fantasy collection for more celestial and symbolic shapes, or the full shop if you have a species pairing picked out and need the right silhouette to go in it.
Designs for this project
Frequently Asked Questions
Why does my inlay piece fall straight through the hole?
Because both parts were cut from the same outline. The cutter removes a finite width of material centred on that line, so the cavity comes out larger than the drawn shape and the insert comes out smaller by the same amount. The gap you see is roughly one cutter width on every side. Fix it with an allowance: move the cavity's cut line inward and the insert's cut line outward before cutting.
Should I make the cavity smaller or the insert bigger?
Both close the same gap, and the safe default is to split it: shrink the cavity by half a kerf and grow the insert by half a kerf, so each part finishes exactly the size you drew. If the fragile part is the insert, a fine crescent horn or a slender star point, put more of the allowance on the insert so it comes out heavier. If the fragile part is the base board, a narrow strip between two closely spaced elements, put more on the cavity so that strip keeps its material.
Can a laser cut a wood inlay, or do I need a CNC router?
A laser does the through-window style well: cut a window in one board, cut the matching shape from a contrasting board of the same thickness, and glue both to a backer so the face sits flush. A router offers controlled pocketed and V-carved methods with an intact floor. A laser can also remove a shallow pocket by engraving, but achieving a flat, repeatable depth in wood is a separate challenge.
Which designs make good inlays?
Bold, closed, self-contained shapes with generous line weights. Crescents, moon phases, sunbursts, animal silhouettes and single glyphs all inlay well. Constellation art, hairline linework and anything with sharp interior corners fights the process, because a round bit cannot reach a sharp inside corner and a sliver of wood too thin to handle will break before it reaches the glue.