You bought a design for a 12 inch sign and now you want it on a 2 inch keychain. Or the file imported into Design Space at a baffling 0.6 inches wide and you are wondering whether something broke. Resizing is the first thing every crafter does to every file, and it is surrounded by more confusion than any other basic skill: when scaling is safe, why imports arrive at strange sizes, and why a design that cut beautifully at 10 inches falls apart at 2.
Here is the full picture. We build vector files all day, so this covers not just which handles to drag in each program, but the parts most tutorials skip: what scaling does to stroke widths, and where the practical size floor and ceiling actually are.
Tip
Short answer: scaling an SVG never costs quality, because the file is math, not pixels. Resize freely, always proportionally, and mind two physical limits: details thinner than about a millimeter struggle to survive cutting at small sizes, and your machine's work area caps the large end.
Why vector scaling is always safe
An SVG stores shapes as coordinates and curves, not as a grid of pixels. When you resize one, the software multiplies every coordinate by a scale factor and redraws. There is nothing to stretch, blur, or interpolate, which is why the operation is mathematically lossless in both directions.
Compare that with a PNG. A 500 pixel image enlarged to 5000 pixels has to invent 99 pixels for every real one, and inventing pixels looks exactly like what it is: blur. This is the core difference between the two file families, and if you want the whole story, our format comparison covers it in depth.
| Operation | SVG (vector) | PNG/JPG (raster) |
|---|---|---|
| Enlarge 10x | Perfectly crisp | Blurry and pixelated |
| Shrink 10x | Perfectly crisp | Fine, but detail is discarded |
| Enlarge, then shrink back | Identical to the original | Permanently degraded |
The table is the whole argument for working from SVGs: resizing is a decision you can always change your mind about.
The only math you need
Most resizing is just typing a width into a box, but two small calculations cover every situation the box cannot.
Scale factor. Target size divided by current size. A design that is 8 inches wide and needs to be 30 inches wide gets scaled by 30 ÷ 8 = 3.75, which matters when your software offers a percentage field: enter 375%.
The other dimension. Proportional scaling means both dimensions use the same factor. That 8 by 6 inch design scaled to 30 inches wide becomes 22.5 inches tall. Worth computing before you commit, because the height is what usually collides with a material blank or a machine bed.
That is genuinely all of it. DPI, resolution, and megapixels have no meaning for a vector file, so any exporter asking you about them is asking about a raster copy, not the SVG itself.
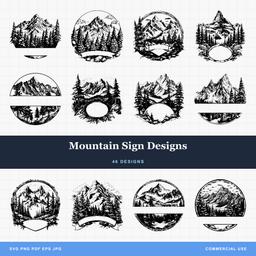 Mountain Sign Designs46 designs, commercial license included$3.99
Why your SVG imported at a weird size
This is the most common resize question we get, and the answer is reassuring: nothing is wrong with the file. An SVG's coordinates are unitless numbers, and each program decides for itself how to map them to real-world inches or millimeters. One common convention treats 96 units as an inch, another uses 72, and some cutting programs apply their own defaults on top.
The result is that the same file can open at 2 inches in one program and 8 in another. The fix is not to hunt for a "correct" file but to make sizing part of your import routine: select the design, type the width the project needs, and move on. Thirty seconds, every import, zero surprises at the machine.
Resizing in each program
The mechanics are similar everywhere: drag a corner for rough sizing, type numbers for exact sizing, and keep proportions locked.
Cricut Design Space
- Click the design to select it.
- Drag a corner handle to resize. Design Space keeps proportions locked by default.
- For exact sizing, type into the W or H field in the top toolbar.
- The small lock icon between W and H controls proportional linking. Leave it locked unless you have a deliberate reason not to.
- Check the units dropdown if numbers look off; inches and centimeters are one setting apart.
Silhouette Studio
- Select the design.
- Drag a corner handle while holding Shift to keep proportions.
- For exact dimensions, open the Transform panel and enter width or height.
- The lock toggle in the panel links the two dimensions.
Inkscape
- Select the design with the arrow tool.
- Drag a corner while holding Ctrl to keep proportions, or type into the W and H toolbar fields with the lock engaged.
- Set the unit dropdown next to those fields to inches or millimeters so you are working in real measurements.
- One Inkscape-specific detail: the four toggle buttons at the right of the selection toolbar control whether stroke widths, corners, and gradients scale along with the object. For craft work, leave stroke scaling on so lines keep their proportions. More on why in a moment.
For everything else Inkscape can do to a design, our Inkscape editing guide picks up from here.
LightBurn
- Select the design.
- Type into the Width or Height fields in the numeric toolbar, or drag a corner handle.
- The padlock between the fields keeps proportions linked.
- After scaling, glance at your interior line widths before running the job, especially if the design mixes engraved fills with scored lines.
What scaling does to stroke widths
Here is the piece most resizing tutorials never mention. A vector shape has two possible kinds of ink: a fill, the colored area inside the outline, and a stroke, a line drawn along the outline with its own width setting. Our cut-oriented designs are built as fills precisely because fills have no width to misbehave; the shape you see is exactly the shape the blade follows at any scale.
Strokes are where surprises live. A stroke width is a stored number, say 1 point, which is about a third of a millimeter. When software scales stroke width along with the object, proportions stay intact and everything looks right. When it does not, or when a stroke-heavy file is scaled far in either direction, lines drift out of proportion: enlarge a 1 point stroke design to ten times its size without stroke scaling and you get spider-silk hairlines on a huge piece; shrink line-art the same way and strokes can dominate the design.
The practical habits that follow from this are short. Keep stroke scaling enabled in Inkscape. After any dramatic resize, zoom in and sanity-check line weights. And if a design will be laser cut rather than engraved, remember that many laser programs treat thin strokes as cut or score paths, so a stroke's width there is an instruction, not just a look.
The floor: how small can you go?
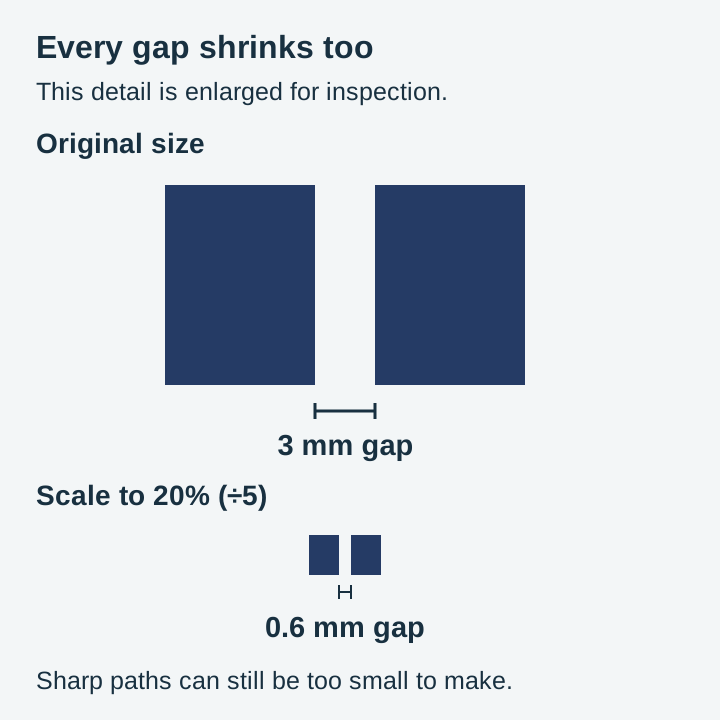
Mathematically, there is no floor. Physically, there absolutely is, and it is the reason a design that cut beautifully at 10 inches shreds at 2. When you scale a design to one fifth of its size, every feature inside it scales the same way: the 3 millimeter gap between letters becomes 0.6 millimeters, and the delicate whiskers on a cat design become finer than a human hair.
The rule we design to is simple, and it is a drawing decision rather than a measurement: keep features and gaps above roughly a millimetre at final cut size for vinyl work, and they can run modestly finer for engraving, where the beam draws rather than cuts. That is a starting point to check against your own material, not a threshold we have measured. Below that, vinyl details tear during weeding or lift with the transfer tape, and neighboring engraved lines can bleed into each other.
So before shrinking any detailed design, look at its thinnest feature and imagine it at the final size. If the answer is "fraction of a millimeter", pick a bolder design instead of fighting the material. This is exactly why silhouette-style packs shrink so gracefully and highly detailed engraving designs are happiest at 4 inches and up.
The ceiling: how big can you go?
Going up, the math also never breaks, and the constraints are practical ones.
Your machine's work area. Every cutting machine has a published maximum cut width and length; consumer machines from Cricut and Silhouette sit around 12 inches wide with mat or roll lengths varying by model, and laser beds vary enormously. Check the manufacturer's specifications for your exact model rather than a blog table, since capabilities differ even within a product line.
Oversize projects are split, not abandoned. A 30 inch decal on a 12 inch machine is cut as sections and assembled on the surface. Split at natural boundaries in the artwork, between letters or elements rather than through them, and alignment during application becomes forgiving instead of fussy.
Visual weight changes with distance. A line weight that reads as delicate at hand-held size can read as barely-there from across a room. For large signs, bolder designs carry better, which is why sign-oriented packs are drawn with heavier shapes to begin with.
Multi-layer designs: resize together, always
If a design has multiple layers, one rule outranks everything else in this article: resize the whole design while it is grouped, before any ungrouping. Every layer scales around the same center by the same factor, so registration between layers survives perfectly.
Resize layers individually and they will never align again, because each one scales around its own center. If you have already made this mistake, undo back to the grouped state rather than trying to nudge layers back into registration by eye. Our layers guide covers how these files are structured and why the grouping exists in the first place.
Size with confidence
Resizing is where SVG files pay for themselves. The same $3.99 pack makes bookmark-sized gifts this week and a porch sign next month, with zero quality difference between them, as long as you scale proportionally and respect the physical floor and ceiling.
Need a quick browser-based option? Craftgineer's Canvas Pro resizes and exports SVG files free in your browser, no installation needed. And if you are still getting oriented with vector files in general, start with the beginner's guide to SVG files.
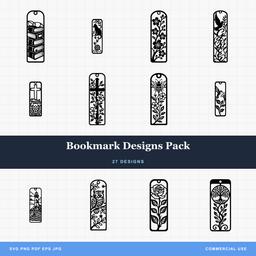 Bookmark Designs Pack27 designs, commercial license included$3.99
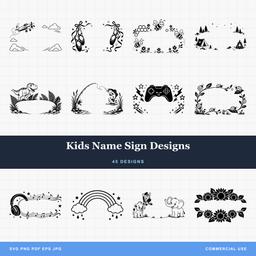 Kids Name Sign Designs45 designs, commercial license included$3.99
Browse the full catalog knowing that every design in it is a true vector. Whatever size your next project needs, the file already supports it.
Designs for this project
Frequently Asked Questions
Why did my SVG import at the wrong size?
Different programs assume different units when they read an SVG's coordinates, so the same file can arrive tiny in one program and enormous in another. Nothing is wrong with the file. Select it and type the exact dimensions you want.
Can I enlarge an SVG as much as I want?
The math never degrades, so yes, a vector stays sharp at any size. The practical limits are your machine's work area and the visual weight of thin lines, which can look like faint hairlines on a very large piece.
Why do small details disappear when I shrink a design?
The paths still exist, but physics catches up. Below roughly a millimeter, vinyl features tear during weeding and closely spaced lines can merge when cut or engraved. Shrinking the file is easy; shrinking what a blade or beam can execute is not.
Should I ever stretch a design instead of scaling it proportionally?
Almost never. Changing width without height distorts every shape in the design. The rare exception is gently adjusting standalone text to fit a space, and even then the distortion should stay small enough that nobody can spot it.