The Glowforge uses a browser-based app instead of traditional laser software, which makes it incredibly easy to get started — but there are a few SVG-specific things you need to know to get the best results. This guide covers the complete workflow.
Uploading SVG Files to Glowforge
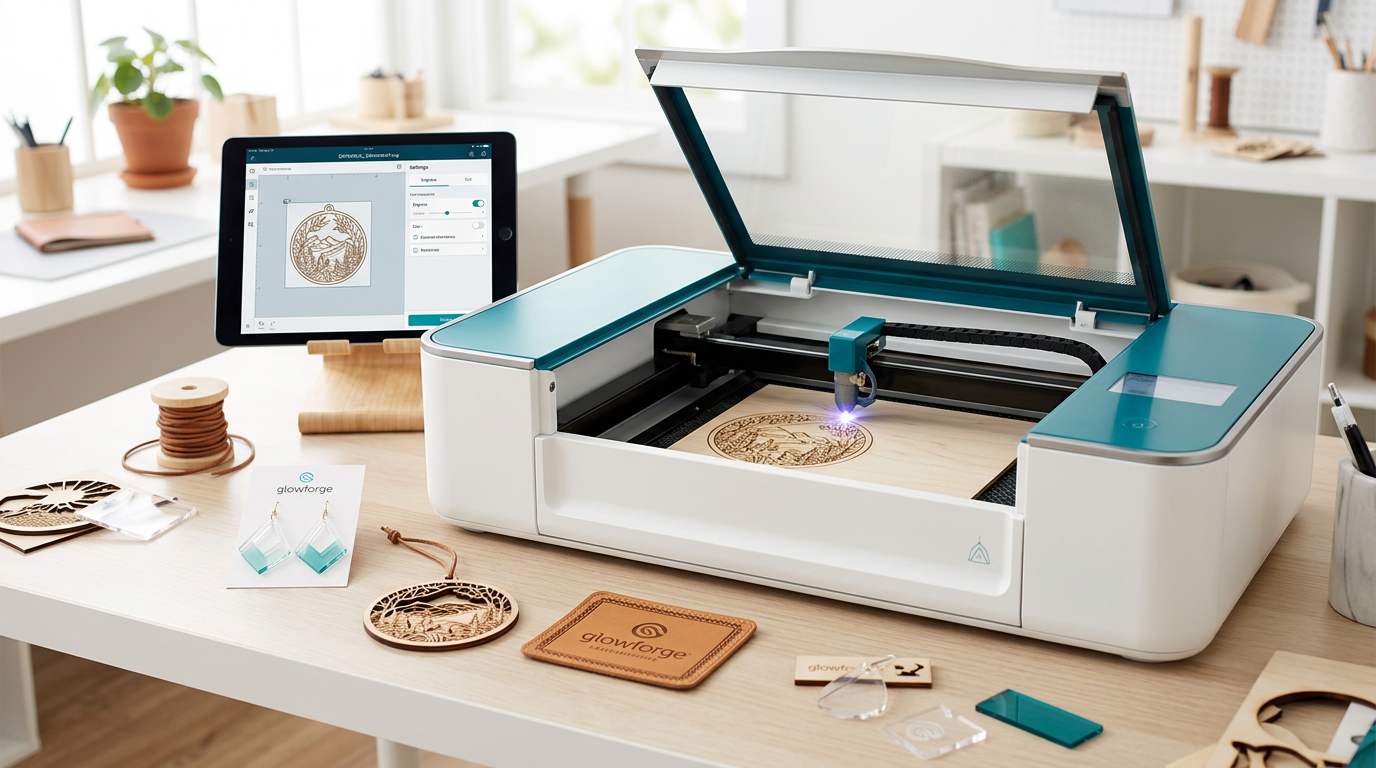
Open the Glowforge app at app.glowforge.com and sign in. Click Create to start a new project, then click the Upload button (the plus icon or the upload area). Select your SVG file from your computer.
The Glowforge app reads your SVG and displays it on the virtual bed. It automatically interprets the design elements:
- Filled shapes become engrave operations
- Strokes / outlines become cut or score operations
- Different colors are separated into individual steps that you can configure independently
This color-based separation is the key to Glowforge workflow. If your SVG has a black filled area and a red outline, you'll see two steps: one engrave (black) and one cut (red).
Resizing Your Design
Click on the design to select it. Drag the corner handles to resize. The Glowforge app maintains proportions by default. You can also enter exact dimensions by selecting the design and typing in the width or height field.
Maximum printable area: The Glowforge has a bed size of roughly 19.5" x 11", but the actual printable area is smaller — about 18" x 10.9" for the Basic and Plus, and 18" x 10.9" for the Pro. The app grays out areas outside the printable zone.
Configuring Operations
On the left sidebar, each color/step in your design has its own settings panel. Click on a step to configure it:
Engrave
Used for filled areas. Settings you can adjust:
- Speed — Faster means lighter, slower means darker/deeper
- Power — Higher power means deeper engraving
- LPI (Lines Per Inch) — Resolution of the engrave. 270 LPI is standard; 340 LPI gives finer detail but takes longer
- Number of passes — Multiple passes at lower power can give more consistent results than one aggressive pass
Cut
Used for outlines that should go all the way through the material. The Glowforge adjusts settings based on your material selection — if you use Proofgrade materials, it sets everything automatically.
Score
A lighter cut that marks the surface without going through. Great for fold lines, decorative outlines, or adding detail around an engrave.
Using Proofgrade Materials
Glowforge sells Proofgrade materials (plywood, acrylic, leather) with a QR code that the camera reads automatically. When detected, the app sets optimized speed, power, and focus for that exact material. This is the easiest way to get great results — especially when you're starting out.
For non-Proofgrade materials, you'll select Unknown Material and enter the thickness manually. Then configure each step's settings based on your material. Start with conservative settings and run tests.
Tips for Better Glowforge Results
Use the Set Focus Feature
Click Set Focus and click on the area of your material where the design will be placed. The Glowforge measures the exact distance and adjusts the focal point. This is more accurate than manual thickness entry and gives sharper engravings.
Pin Your Material Flat
If your material is slightly warped (common with thin plywood), use Glowforge hold-down pins or small magnets to keep it flat. Even a slight bow affects focus and cuts.
Clean Masking = Clean Results
Proofgrade materials come pre-masked. For other materials, apply painter's tape or transfer tape before engraving. The masking catches smoke residue and soot, giving you clean edges when you peel it off. This is especially important for light-colored woods.
Manage Your Order of Operations
The Glowforge processes steps from top to bottom in the left panel. Drag steps to reorder them. Always engrave before cutting — if you cut first, the pieces may shift before the engrave runs.
SVG Preparation Tips for Glowforge
- Use separate colors for engrave and cut — Black for engrave, a distinct color (red, blue) for cut lines. This gives you independent control over each operation.
- Convert text to paths — The Glowforge app can display some fonts, but converting text to paths in Inkscape (Path > Object to Path) ensures your text looks exactly right.
- Remove hidden elements — The Glowforge app will try to process invisible or hidden SVG elements, which can add unwanted operations.
- Verify closed paths for cuts — If a cut path isn't closed, the Glowforge may interpret it as a score instead.
Find Designs for Your Glowforge
Browse our laser-ready design collections for SVG files that work beautifully with the Glowforge. Every design pack includes files in multiple formats — SVG for cutting and engraving, plus PNG, PDF, EPS, and JPG for other uses.
For more laser engraving guidance, read our comprehensive settings guide or check out our LightBurn tutorial if you work with other laser machines too.